
Happy Holidays! I'm Jenelle from Echinops & Aster, where I blog about all of my creative adventures in quilting, embroidery, and sewing. I'd love the chance to get to know you better, so feel free to stop by whenever you get a chance and say "Hi"! And right now, after you check out my tutorial, head over to my blog for a FreeSpirit GIVEAWAY!
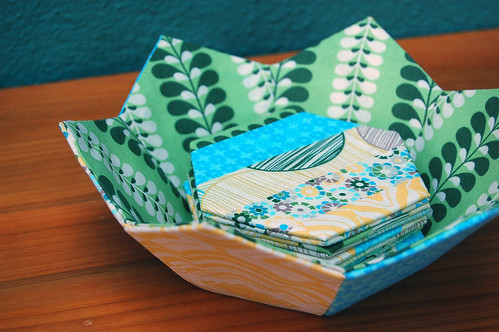
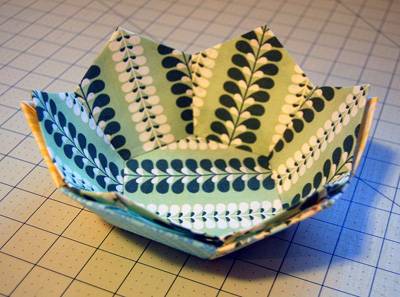
I've been looking forward to having the chance to share a fun tutorial with you today as part of the 12 Weeks of Christmas series! When I think about my favorite parts of the winter season, one thing I look forward to most is getting cozy under a quilt with some hand stitching and a mug of my favorite cocoa. I thought why not share that moment today with a tutorial to make a hand stitched Flowering Coaster Set.
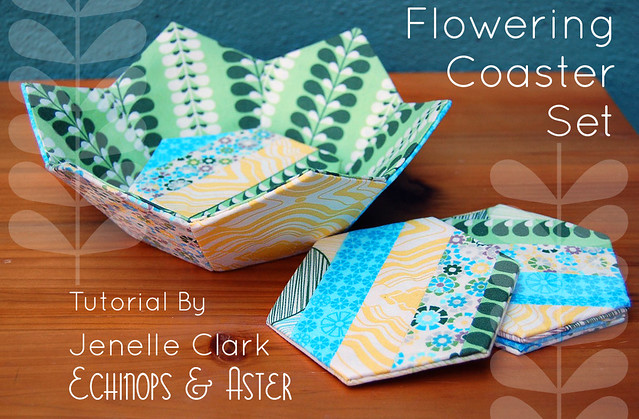
Stitch and enjoy a movie or take this project along with you. Using English Paper Piecing techniques and hand-stitched construction, it's completely portable and really allows you to utilize those spare moments during the busy holiday season when you might be traveling or simply waiting. In no time you'll have the perfect hostess gift, ready for your next holiday get-together!
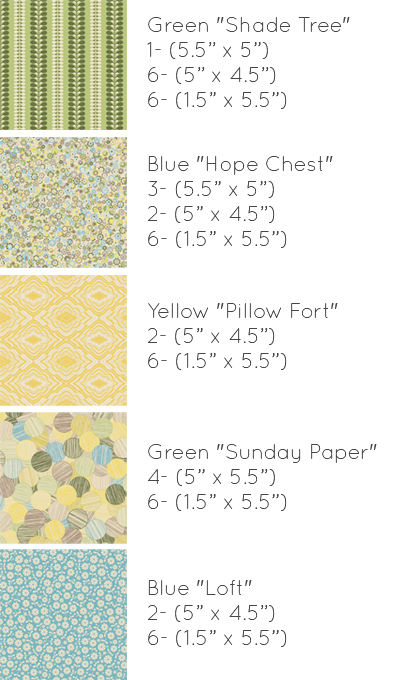
1 FQ each from "In My Room" by Jenean Morrison:
- Green "Shade Tree"
- Blue "Hope Chest"
- Yellow "Pillow Fort"
- Green "Sunday Paper"
- Blue "Loft"
Other Supplies and Notions:
- 1/2 yard 71F Peltex single sided fusible
- Hand sewing needle
- Basting thread
- Coordinating thread (neutral cream color)
- Thread wax or thread conditioner (optional, but helpful)
- Printed copies of PDF Template Sheets (see below for more info)
- Scrap thin cardboard (like from a cereal box)
- Washable glue stick
- Marking pen or pencil
Cut the following fabric pieces:
Step 1: Print out the template sheets making sure to set your print scaling to "none" or "100%" depending on your printer settings. Print two copies each of page one and page two. I used cover-stock to print my templates, but heavier weight copier paper will also work. Carefully cut out each shape. Then adhere one of the hexagon shapes and one of the pentagon shapes to the thin cardboard and trim to size to create two templates.
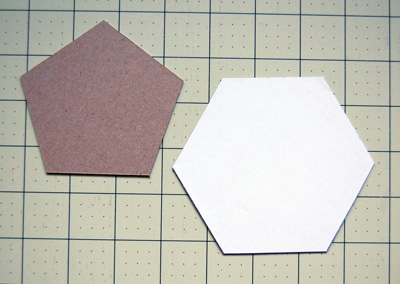
Step 2: Using the cardboard templates, trace on the non-fusible side of the Peltex six pentagons and thirteen hexagon shapes each. Cut these out carefully using scissors.

Step 3: Gather all six of the (5" x 4.5") pieces in the Blue "Hope Chest", Yellow "Pillow Fort", and Blue "Loft" prints. On the wrong-side of each piece, center a pentagon shape leaving a generous 3/8" to 1/2" seam allowance all the way around the shape. Following the manufacturer's instructions, fuse the pentagons to the fabric pieces. The grab one of the (5" x 5.5") fabric pieces in the Green "Sunday Paper" print and center one of the hexagon shapes on the wrong-side leaving the required seam allowance all the way around. Fuse the hexagon to the fabric.
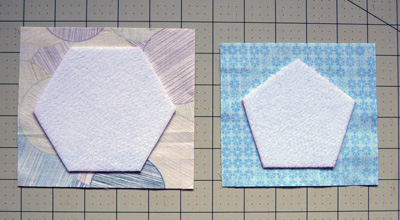
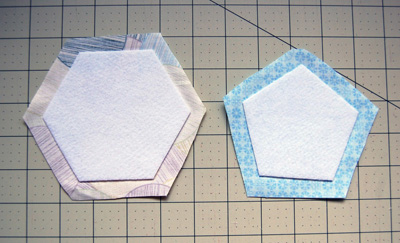
Step 4: Trim all the way around each fused shape leaving a generous 3/8" to 1/2" seam allowance.
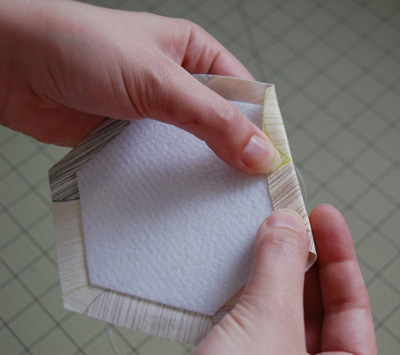
Step 5: Baste the hexagon and pentagon shapes to the fused Peltex using your preferred English Paper Piecing (EEP) method. If using thread wax or conditioner, apply it to the basting thread.
My Preferred EEP Method:
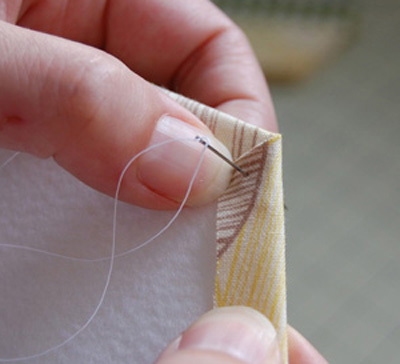
Begin by tightly folding over the seam allowance on one edge of the shape. Then inserted the needle through this fold, coming up through the peltex last, leaving the thread knot on the right-side of the fabric. This makes removing basting stitches easier later on.
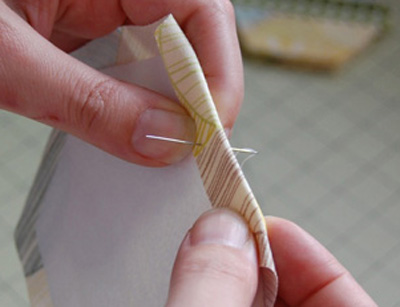
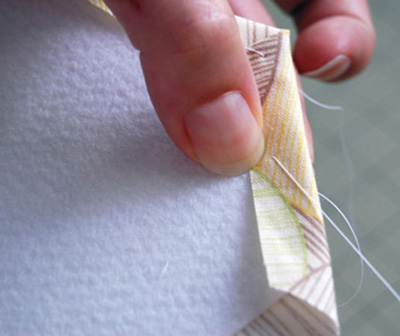
Then moving around the shape clockwise, fold the corner fabric neatly (like a present) and insert the needle down through the fold to tack in place. Then make an additional stitch in the center of the newly created side fold (see below).
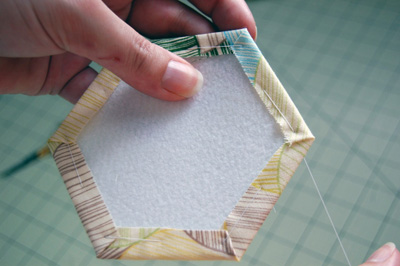
Keep turning the shape clockwise, basting each corner and side fold until the shape is completely wrapped. Finally press the shape, using starch if desired.

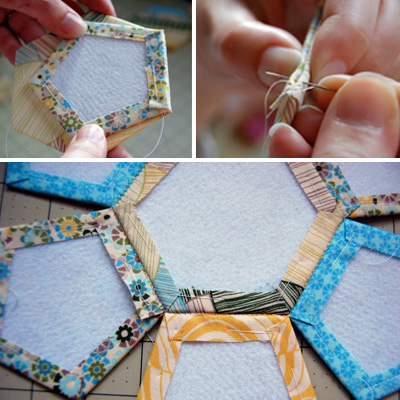
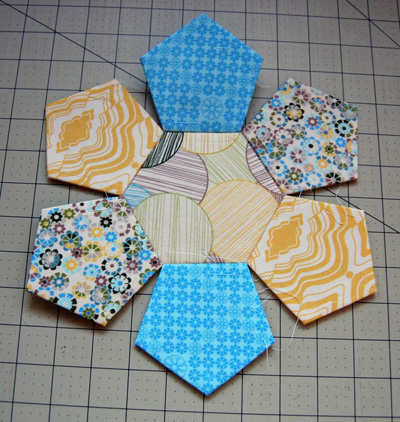
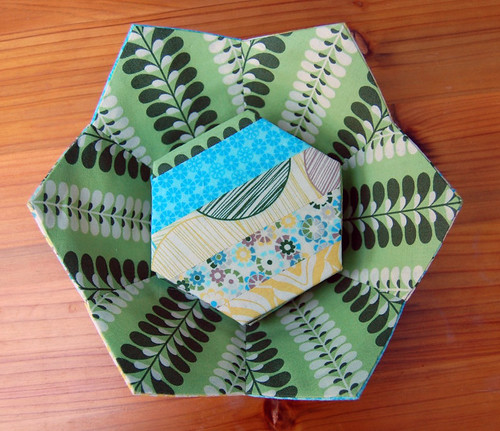
Step 7: Arrange the wrapped pentagons around the sides of the hexagon to form a flower shape. Distribute the prints as desired. Then whipstitch the pentagon shapes to the sides of the hexagon using coordinating thread, keeping right-sides together. To make the whipstitching as invisible as possible, only grab a few threads with the needle in each stitch and make sure the thread color is closely matched to the fabric (I used a neutral cream color). Press when finished to set stitches.
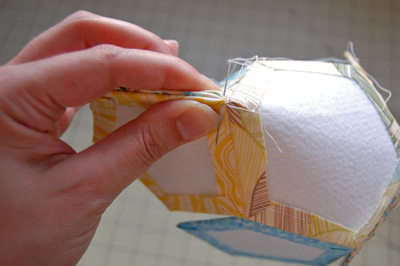
Step 8: Then begin whipstitching the sides of the pentagons together to form the outer bowl shape (also using the coordinating thread). Stitch with the wrong-side facing out.When finished stitching the bowl shape together, gently push the bowl right-side out (the wrong-sides will then be inside the bowl). Set aside for later.
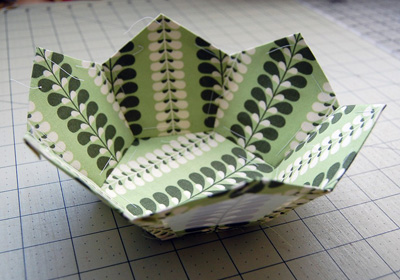
Step 9: Collect each of the (5" x 5.5") and (5" x 4.5") pieces in the Green "Shade Tree" print. Taking the remaining printed paper templates and the washable glue stitch, glue baste six of the pentagon templates to the centers of each of the (5 x 4.5") fabric pieces as well as the remaining hexagon shape to the center of the (5 x 5.5") fabric piece, leaving a 3/8" to 1/2" seam allowance on each. Trim around each shape leaving the required seam allowance and thread baste using your preferred (EEP) method. Press each finished wrapped shape, using starch if desired.

Step 10: Whipstitch the wrapped pentagon shapes to the hexagon sides (just as detailed in Step 7) and press to set stitches. Then whipstitch the pentagon sides together to form the inner bowl shape.
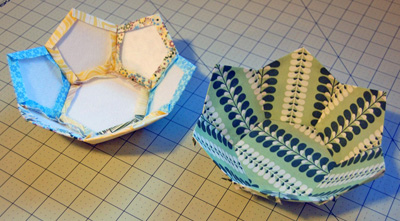
Step 11: Taking the outer and inner bowl shapes, stack them together snuggly as shown. Adjust as needed until all of the point and sides of the shapes align. Using an invisible ladder stitch, sew together the top edges of the bowl. When finished, sew a small tack stitch in each of the six corners of the hexagon in the base of the bowl to help further anchor the inner and outer pieces together. Then carefully remove all basting stitches. The bowl is now finished!
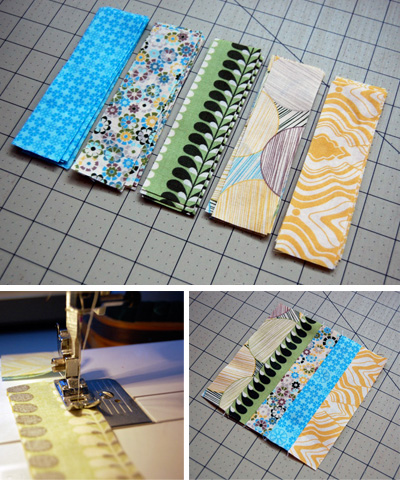
Step 12: To make the coasters, collect all of the (1.5" x 5.5") pieces of fabric. Lay them out in groupings of five as desired. Then chain stitch the strips of fabric together (using a sewing machine) to form six (5" x 5.5") pieced rectangles. Press all seams open.
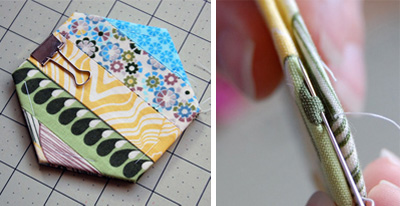
Step 13: Center on each pieced block one Peltex hexagon shape, leaving a generous 3/8" to 1/2" seam allowance. Following the manufacturer's instructions, fuse the hexagons to the pieced rectangles. Then trim around each shape leaving the required seam allowance. Thread baste using your preferred (EEP) method and press, using starch if desired. Repeat this step for the remaining (5" x 5.5") fabric pieces in the Green "Sunday Paper" and Blue "Hope Chest" prints.

Step 14: Pair one pieced hexagon with one non-pieced hexagon, wrong-sides together, lining up all the edges and points. You may wish to use a binding clip to hold them in place. Then using an invisible ladder stitch, sew the top and bottom of the coaster together. Repeat for all six coasters and give a quick press to each if desired.
Then enjoy your new coaster set immediately or wrap it up and give it as a gift (with some of your favorite holiday cocoa mix, of course). : )
Also make sure to post picks of your finished projects in the Flickr group here. I can't wait to see what you'll make!
Copyright Jenelle Clark 2012 / For Personal Use Only


11 comments:
OOO! thanks for sharing this with us. I am going to try to make this for a gift.
Excellent tutorial Jenelle!
wonderful work - love these
Very nice! Thanks for the tutorial.
What a beautiful gift to make for anyone. Thank you for the great tutorial.
Love the idea! Thanks for sharing!
Thank you for the tutorial!
This is great but I'm really bummed I can't pin it and share it with my friends.
I LOVE bowls! Thanks for sharing this tutorial. I have added the bowl and coasters to my TO DO list. LOVE IT!
I love bowls! Your tutorial caught my eye right away. Thanks for the great tutorial. I am adding the bowl and coasters to my TO DO list and already mentally selecting the fabrics.
I made my first one just now from a charm pack. Really fun and not too difficult. Thank you!
Post a Comment