
Supplies
- 1/3 yard Main Fabric (shown in Simple Plaid Corduroy from Chicopee by Denyse Schmidt)
- (9) 3" squares Zigzag Print (shown in Paisley Corduroy from Chicopee by Denyse Schmidt)
- (9) 3" squares Zigzag Solid (shown in Freespirit Solid)
- Standard composition book, 7.5" x 9 3/4"
- Note: Non-directional fabrics are best for any prints used. Since the plaid print was directional, the direction of plaid stripes differs between the zigzag and background portions.
Beginning with your main fabric, cut an 5" wide width-of-fabric (WOF) strip and a 3" wide WOF strip. Shorten both to 26.5" long, producing 5" x 26.5" and 3" x 26.5" pieces. Use the remaining main fabric to cut (9) 3" squares and (1) 3.5"x 12" strip.
Cut zigzag print and solid fabrics to make (9) 3" squares per fabric. Slice all 3" squares in half on diagonal, as shown. This will create a 18 triangles per fabric: main fabric, zigzag print and zigzag solid.

Step 2: Zigzag Piecing
Layout your triangles to create a zigzag design. You'll have 3 rows of triangle pairs: main fabric with zigzag print, zigzag print with solid and solid with main fabric.
Begin by sewing all triangles into pairs.

When matching triangles right sides together for piecing, overlap fabrics slightly as shown.

Make sure the triangle points stick out just enough so that your 1/4" seam allowance begins and ends at the location where both fabrics' raw edges meet.
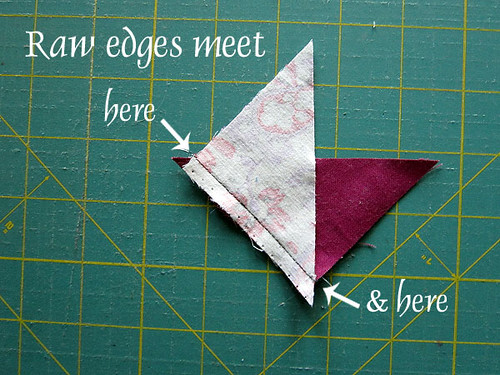
When sewn properly and pressed open, the triangle pair will have neat, flush corners. This can take a bit of practice, so don't be shy with the seam ripper. That's how we learn!

After creating pairs, sew pairs together to create long rows of triangles.
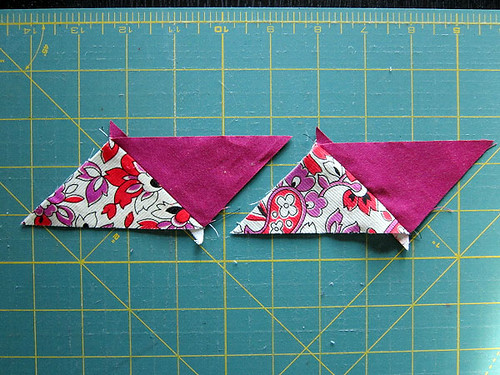
Again, overlap fabrics as shown. Be slightly generous when overlapping fabrics at this stage! The 1/4" seam allowance should intersect the matched raw edges as before.
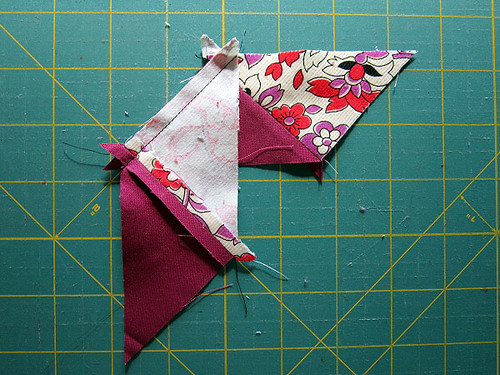
When sewn properly and pressed open, the triangle set will have 1/4" seam allowances extending beyond each triangle tip!

Piece together all 3 rows of triangle pairs. Each row will have 9 triangle pairs total.

Note: I learned this style of piecing zigzags from Anna Maria Horner's Folk Dance quilt pattern, a free pdf. I prefer it to the half-square-triangle method of piecing zigzags since it uses larger triangles, which creates a zigzag with fewer seams and more beautifully presented fabric. The drawback is that the triangle rows have exposed biased edges. Take care when sewing rows together not to stretch your fabrics!
When joining zigzag rows, match triangle points so that rows are stacked right on top of each other with no offset. Use lots of pins to ensure triangles remain aligned while sewing and to discourage stretching. Join with a scant 1/4" to preserve triangle points.
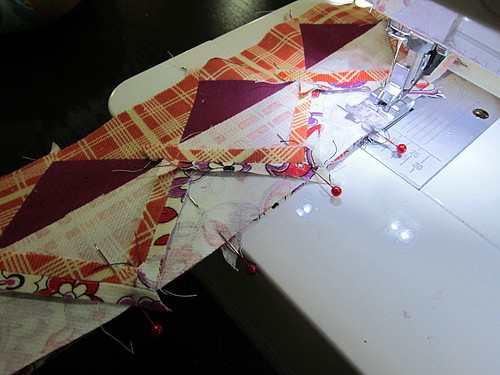
Lastly, press row seams open. Trim zigzag section to 26.5" wide, cutting off irregular sides.

Step 3: Piecing the Cover
Add the 3" x 26.5" main fabric piece above the triangle row and the 5" x 26.5" piece below. In both cases, sew with the wrong side of the zigzag section facing up so that you can see the seam allowance and be sure not to sew through the triangle tips.
Press seams open. Then, trim the work-in-progress so that it is 12" tall x 26.5" wide.
Add the 3.5" x 12" main fabric piece to the left side of the work. Press seams, then trim to 12" x 29.5".

Step 4: Finishing
Turn under the 12" sides of the cover by 3/4". Press the 3/4" fold on each 12" edge. Finish the turned under edges with a 1/8" topstitch. Lastly finish the raw, turned under edge of the 12" sides with an overcast or zigzag stitch to prevent fraying. (I overcast the raw edges after the top stitching because I feel it increases accuracy to delay it.)

Back at your cutting mat, lay the work right side up. Fold one side in about 6 1/2" and then fold the other side in about the same amount. As you fold, you are exposing the wrong side of the work and creating the inside flaps of the journal cover. Fiddle with it until your folded work is 15" long, with both flaps about the same size (about 6 1/2" each). Check the total length (15") against the cutting mat lines. A bit of the right side portion should still be revealed at center.
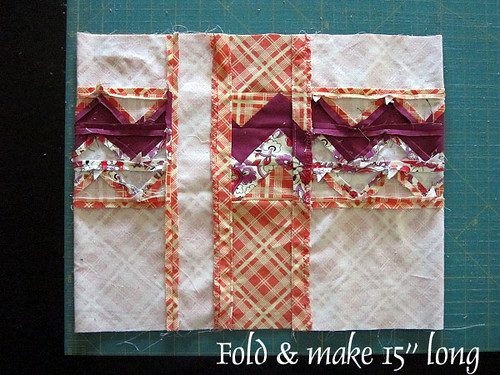
Now, use a clear quilting ruler to mark sewing guidelines at 1" from the top and bottom long edges. Mark these guidelines over the wrong side portion only, skipping the right side exposed at center. Then, pin and stitch along the marked lines only, backtacking at the start and finish of each line.
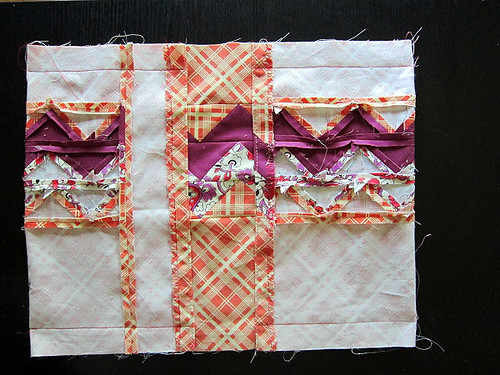
Clip corners and turn right side out. Press thoroughly. I often use a little spray starch to get the cover a bit crisp! Slide in the composition book, which will require bending the cover all the way back at one point.


More more details and photographs of the finishing steps, see my general Journal Cover tutorial. I've made all sorts of these covers, but this is my first public tutorial for a pieced version.
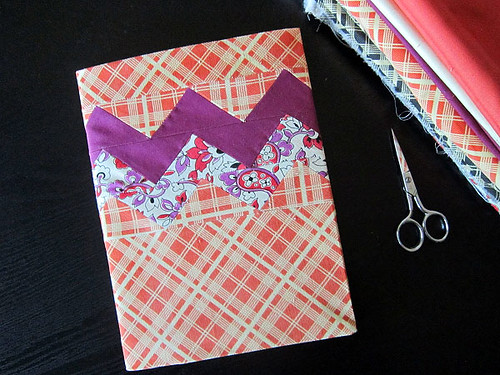
I'd love to see your creations at the Stitched in Color flickr group. Happy stitching!


Gosh, that's cute. I think that would be a nice edge for a pillow case, too.
ReplyDelete